Mostrando entradas con la etiqueta DIY. Mostrar todas las entradas

lunes, 13 de agosto de 2012

DIY: Tu pulsera veraniega

Y seguimos con las pulseras! Las pulseras coloridas son un must para este verano, así que apúntate a la tendencia con esta pulsera tan fresca! 

And we continue with the bracelets! The colorful bracelets are a must for this summer, so sign up to the trend with this bracelet so cool!


Los materiales que necesitaremos son: hilo grueso (yo lo compré de algodón en Bendix y de un color muy veraniego), mosquetón y argollas y cadenas del mismo tono. Yo escogí la combinación de verde fluor con dorado, pero como siempre, podéis escoger la combinación que más os guste. 

The materials you will need are: heavy thread (I bought Bendix cotton and very summery color), and snap rings and chains to match. I chose the combination of fluoro green and gold, but as always, you can choose the combination that you like.


Colocamos en una base de Porex Pan dos cadenas de un largo aproximado de 20 centímetros y las sujetamos a la base con alfileres. Hacemos un nudo en la esquina del hilo de algodón y enhebramos el hilo como se muestra en la foto (de forma diagonal) desde la primera argolla de la primera cadena a la segunda argolla de la segunda cadena y repetimos el enhebrado. 

We put in a base of Pan Porex two chains of approximately 20 inches long and hold them to the base with pins. We make a knot in the corner of cotton yarn and we have to thread as shown in the picture (diagonally) from the first ring of the first string to the second ring of the second string and repeat the threading.


Repetimos el procedimiento hasta acabar con todas las cadenas, intentando que quede regular. 

Repeat the procedure until you finish all the strings, trying to remain regular.


Hacemos el mismo procedimiento pero esta vez uniendo la segunda de las cadenas con la tercera y enhebramos como se muestra en la foto. 

We do the same procedure but this time joining the second chain with the third and we thread as shown in the picture.


Y al final nos quedará una cosa así. 

And in the end we will be a thing like this.


En una esquina unimos las cadenas con una argolla sacada de una cadena y a esta argolla le colocamos una argolla más pequeña y el mosquetón. 

On a corner join chains with a ring out of a chain and this ring will put a smaller ring and clasp.


En la otra esquina colocamos una cadena no muy larga para cerrar la cadena y así poder ajustarla a la medida de nuestra muñeca. 

In the other corner we place a not very long chain to close the chain so you can adjust it to fit your wrist.


Y este es el resultado final! La podéis llevar sola o combinada con otras pulseras! Es fácil de hacer y no necesita muchos materiales! Os animo a que la hagáis y que me enviéis la foto por Facebook AQUÍ. Espero que os haya gustado!

And this is the final result! The can take alone or combined with other bracelets! It is easy to do and do not need many materials! I encourage you to that yourselves and send me a photo on Facebook HERE. I hope you liked it!


jueves, 9 de agosto de 2012

DIY: Hazte una pulsera con tachuelas

Hoy os enseño como haceros vuestra propia pulsera personalizada! Yo elegí una tira de cuero en leopardo customizada con tachuelas en negro, pero como no, podéis elegir el color que más os guste. 

Today I show you how to make your own personalized bracelet! I chose a leopard thong customized with studs in black, of course, you can choose the color you prefer. 


Estos son los materiales que necesitaremos. La tira de cuero la compré en Bendix y es de, aproximadamente, veinte centímetros. 

These are the materials you need. The leather strap I bought at Bendix and is about twenty centimeters.


Primero colocaremos el papel sobre la superficie en la que trabajemos para que no se nos manche y colocaremos las tachuelas de la forma que más fácil sea pintarlas. 

First post the paper on the work surface on which to avoid staining and we will put the studs in the way that is easier to paint.


Dejaremos secar las tachuelas un par de horas, ya que este tipo de pintura tarda mucho en secarse. 

We will leave to dry studs a couple of hours, as this type of paint takes a long time to dry.


Mientras la pintura se seca nos mediremos el largo de la tira y colocaremos los corchetes. Tened en cuenta que en la primera foto me equivoqué al colocar el corchete, ya que en la parte donde no hay pelo el corchete va colocado por la parte que tiene una hendidura, y por la parte de pelo va el contrario. Los coseremos con un hilo resistente utilizando una aguja gruesa. 

While the paint dries we will measure the length of the strip and will post the brackets. Note that in the first picture I was wrong to place the bracket, as in the hair where there is no bracket is placed by the party is split, and the hair is the opposite. The sew with a strong thread using a needle.


Una vez secas las tachuelas las colocaremos hacia abajo y hundiremos dos de las patas y dejaremos las otras abiertas. 

Once dry the studs place them sink, down two of the legs and leave the others open.


Colocaremos de la forma que más nos guste las tachuelas y con las patas que habían quedado abiertas uniremos la tira y la tachuela. Podéis utilizar unos alicates si se os hace más fácil. 

We will post the way we like the studs, and legs that were left open will join the tack strip. You can use pliers to make it easier.


Y este es el resultado final! Qué os ha parecido? 

And this is the final result! What do you think?


miércoles, 1 de agosto de 2012

DIY: Make your own clutch

Hoy os enseño como hacer un clutch super sencillo! Prácticamente no tendréis que coser (salvo por la cremallera), porque el truco está en hacerlo con grapas! 

Today I show you how to make a clutch super easy! Practically you will not have to sew (except for the zipper), because the trick is to do with staples!


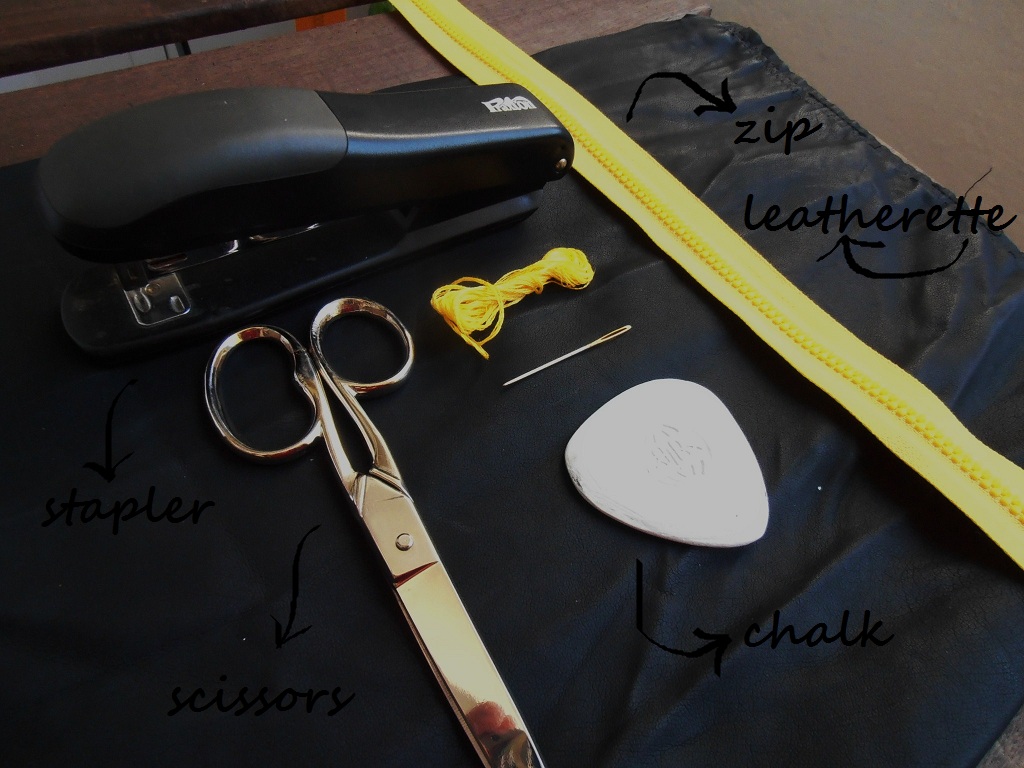
Necesitaremos: una grapadora, unas tijeras, hilo y aguja, una tiza para ropa, una cremallera y un trozo de polipiel rectangular. 
Yo he decidido combinar el negro con un toque amarillo de la cremallera, pero siempre lo podéis adaptar a vuestro gusto. 


We will need: a stapler, scissors, needle and thread, chalk for clothes, a zipper and a rectangular piece of synthetic leather.
I have decided to combine the black with a touch of yellow on the rack, but you can always adapt to your taste.


Primero giraremos el trozo de polipiel por la parte interior y lo doblaremos por la mitad y dibujaremos la forma de nuestro clutch para después cortarlo. 

First we turn the piece of synthetic leather on the inside and it will fold in half and we will draw the shape of our clutch for then cut it.


Cortaremos la pieza que hemos dibujado dejando un margen de aproximadamente dos centímetros para cuando tengamos que unirlo.

We will cut the part that we have drawn with a margin of about two centimeters. 


Colocaremos una hilera de grapas a lo largo de ambos lados de nuestro trozo de tela (recordad que teníamos un rectángulo doblado por la mitad que formaba un cuadrado). Si queréis reforzar el clutch podéis hacer una doble hilera de grapas.

Place a row of staples along both sides of our piece of synthetic leather (remember we had a rectangle folded in half forming a square). If you want to reinforce the clutch you can do a double row of staples.


Y cuando le demos la vuelta a lo que teníamos nos quedará una cosa así. Ahora solo queda ponerle la cremallera. 

And when we turn around to what we had we will have a thing like this. Now we just have to put the zip.


Mediremos el largo del clutch y lo marcaremos en la cremallera para saber hasta donde tenemos que coser y el sobrante de la cremallera lo meteremos dentro del clutch. 

We will measure the length of the clutch and mark it on the rack to know how far we have to sew and the remainder of the rack we will put it in the clutch.


Haremos unas pequeñas puntadas en las esquinas de los laterales para fijarlos y para hacer un pequeño doblez para que no se vea la tela cortada. 

We will make a small stitch in the corners of the sides to fix them and make a small bend so you do not see the cut fabric.


Separaremos la cremallera y coseremos cada parte de la cremallera en cada lado del clutch. 

And sew the zipper will separate each part of the rack on each side of the clutch.


Una vez hayamos cosidos toda la cremallera al clutch, fijaremos el final de la cremallera a la tela para que no se nos mueva.

Once you have sewn the zipper all the clutch, we will post the end of the zipper to the fabric so it does not move us. 


Cortaremos los posibles sobrantes de cuando cosimos la cremallera y el restante de la tela de la cremallera podemos coserlo o cortarlo. 

We will cut off possible surplus when the zipper and sewed the remaining fabric of the zipper can sew or cut.


Y este es el resultado final! Yo decidí colocar la cremallera por fuera y que se vea al completo, pero también podría haber optado por coser la cremallera por dentro, de modo que no se viera la costura. Espero que os haya gustado y que os animéis y me mandéis la foto por facebook AQUÍ

And this is the end result! I decided to put the zipper on the outside and be seen at once, but could also have opted to sew the zipper on the inside, so you do not see the seam. I hope you liked it and that you feel encouraged and send me the picture for facebook HERE!

xxx


jueves, 26 de julio de 2012

DIY: Va de nudos

Aquí os dejo un DIY que he visto mucho por varias páginas y que es super sencillo, así que os animo a todas a que lo hagáis! 

Here you have a DIY I've seen so much in a lot of pages and it's super simple. 


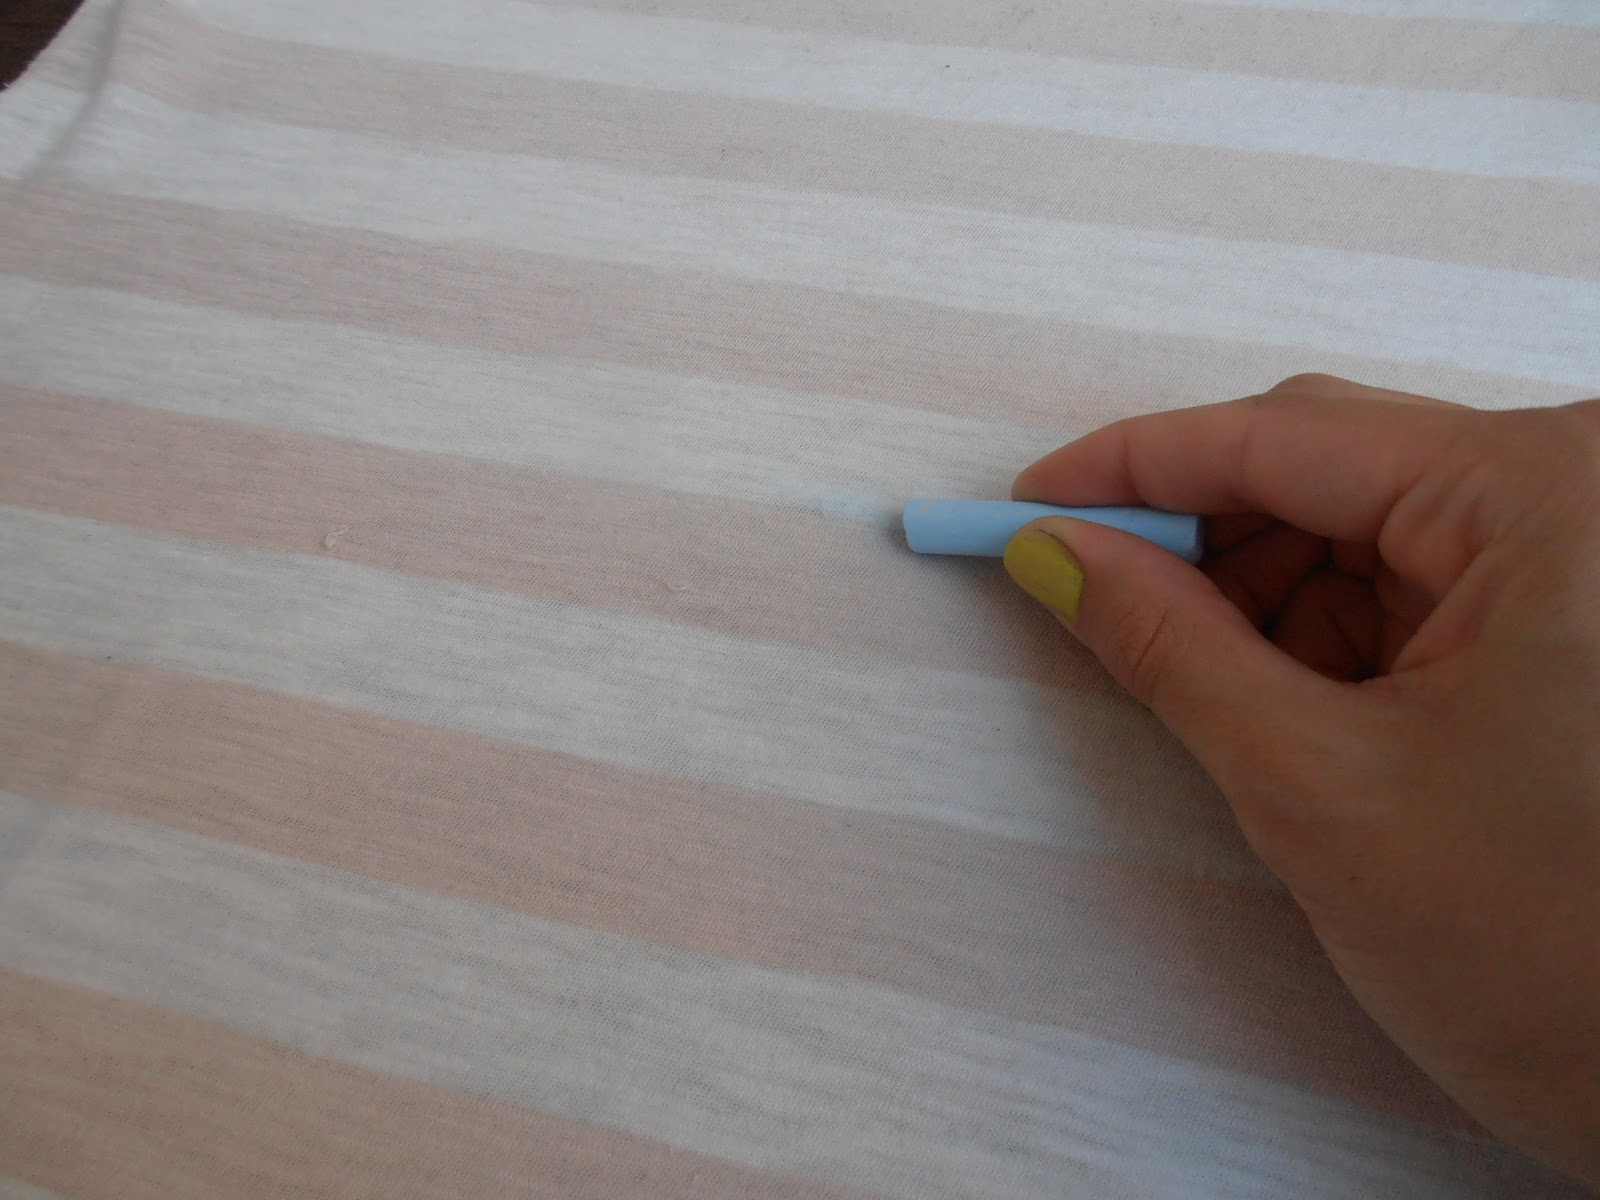
Una vez tengamos todos los materiales tenemos que marcar la línea por donde queremos cortar; lo mejor es que os probéis la camiseta y decidáis por donde. 

Once we have all the materials we habe to draw the line where we want to cut. 


Después sólo tendremos que cortar tiras de un grueso aproximado de dos dedos y no pasa nada si las tiras no os salen perfectas porque después no se notará nada.

Then we'll just cut strips of a thickness of about two fingers and nothing happens if you leave the strips not perfect because then you will not notice anything.


Tenemos que cortar toda la camiseta a tiras, tanto por delante como por detrás. 

We have tu cut all the strips shirt, both front and back.


Una vez cortadas todas las tiras anudaremos unas con las otras 

Once we have cut all the strips in the T-shirt we will knot each other


Cuando tengamos todas las tiras anudadas empezaremos a hacer unos segundos nudos. Será simplemente coger las tiras contiguas de cada nudo y anudarlas entre ellas.

When we have finished with knoking, we will do second knots. It's so simple: we have to knot with the strips adjoining. 


Repetiremos los nudos hasta acabar con las tiras y de esta forma se creará un enrejado por el bajo de la camiseta y finalizaremos los nudos del final con un nudo doble atado bien fuerte. 

Repeat until end nodes and strips This will create a grid for the bottom of the shirt and finalize the final knots tied a double knot very strong.


Y aquí tenemos nuestra camiseta customizada! Podéis hacer el enrejado más grande si os guste más, pero un dato a tener en cuenta es que la camiseta sea bastante larga porque al hacer todo el anudado se encoge. Espero que os haya gustado! 

And here we have our customized t-shirt! You can make the grid bigger if you like more, but a factor to consider is that the shirt is long enough because the knotted do shrugs. I hope you liked it!

martes, 26 de junio de 2012

Primer DIY


Aquí va mi primer DIY del blog. Para los que no lo sepan DIY son las siglas de "Do it yourself"; esto va de jugar un poco con la creatividad y de un par de cosas que tengamos crear algo nosotros mismo, con nuestro sello personal. 

En el DIY de hoy voy a utilizar unos pantalones que tenía muertos de asco en el armario y lo voy a convertir en unos shorts especiales. 


Y aquí van los materiales


En cuanto al cinturón de brillantes lo vamos a utilizar para customizar uno de los bolsillos de nuestro cinturón, así que es algo secundario, y podéis utilizar lo que más os guste o tengáis por casa. Yo tenía este cinturón de hace muchísimos años, de cuando mi madre tenía mi edad, así que he aprovechado para utilizarlo. 

Lo primero que haremos será probarnos los pantalones y hacer una línea para dirigir el corte y cortaremos ambas piernas. 


Después deshilacharemos los bajos y es tan fácil que se puede hacer con las manos estirando la tela y si vemos que nos cuesta podemos utilizar una tijera y hacer pequeños cortes para que nos sea más fácil. 

Cortaremos uno de los bolsillos únicamente de un lado y cogiendo la esquina del bolsillo le haremos una pequeña puntada para que al caminar no nos baile el bolsillo. 

Después añadiremos lo que queramos pegar al otro bolsillo, ya sean tachuelas, pinchos, brillantes o lo que sea. Yo simplemente corte las tiras de los brillantes pequeños y se lo cosí. 


El resultado final es este. 
Espero que os haya gustado y que os haya inspirado para hacer algún short a vuestro estilo y que me lo mandéis.