Hace tiempo, pasándome por uno de mis blogs favoritos B a la moda, vi una de las inspiraciones que a veces cuelga para hacer un DIY. Se trata de metalizar los bolsillos traseros de un pantalón. Creo que queda super chulo, allá vamos...
Long ago, passing by one of my favorite blogs B a la moda, I saw one of the inspirations that sometimes hangs for a DIY. This is metallizing the back pockets of trousers. I think it is super cool, here we go ...
Long ago, passing by one of my favorite blogs B a la moda, I saw one of the inspirations that sometimes hangs for a DIY. This is metallizing the back pockets of trousers. I think it is super cool, here we go ...
Éste será el resultado de vuestros pantalones con bolsillos customizados, pero ahí va como hacerlo!
This will be the result of your customized pants pocket, but here's how!
Necesitaremos una lámina de aluminio (también sirve una lámina de estaño o de cualquier otro metal más o menos flexible), un cuter y un punzón, una goma de borrar o algo sobre lo que podamos perforar sin que estropee la superficie, aguja e hijo y un pantalón, que tendrá que tener los bolsillos traseros altos, como se muestra en la foto, porque si no, no quedará bien el resultado.
We will need aluminum foil (also serves a tin foil or other metal more or less flexible), a cutter and punch, a pencil eraser or something that we can drill without spoiling the surface, needle and child and pants, you have to have high back pockets, as shown in the picture, because otherwise the result will not fit.
Si queréis dibujar directamente en la lámina de aluminio el contorno del bolsillo genial, pero si queréis (como he hecho yo) podéis ayudaros dibujando primero en una hoja de papel el contorno y después recortarla y contornear la forma en la lámina. Así os aseguráis de obtener mejor resultado.
If you want to draw directly on the foil contour pocket great, but if you want (as I have) can help you draw on a sheet of paper the outline and then cut it and outline the way in sheet. So you make sure to get best results.
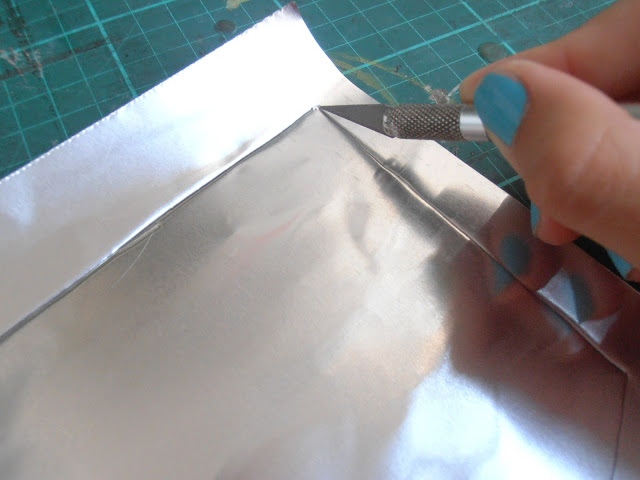
Como os he dicho, dibujaréis el contorno sobre la lámina y después pasaréis a recortarla con el cúter.
As I said, you will draw the outline on the sheet and then cut it will pass to the cutter.
Sobre una superficie donde se pueda cortar con cúter recortaréis la figura con el cúter y os quedará la forma de vuestro bolsillo.
On a surface can be cut with cutter recortaréis the figure with the cutter and will be the way of your pocket.
Una vez hechas ambos bolsillos juntaréis las piezas para hacer los agujeros, que es donde coseremos el bolsillo metálico al pantalón. Haremos cinco agujeros, uno por cada esquina.
Having made two pockets you will bring together the pieces to make the holes, where metal sew the pants pocket. We will do five holes, one for each corner.
Con hijo del mismo color que el pantalón coseremos el bolsillo por todos los agujeros que hemos hecho. Cuantas más veces pasemos el hijo por el agujero y los nudos que hagamos, más resistente será el bolsillo.
With son of the same color as the pants sew the pocket in every hole we've done. The more you spend the child through the hole and the knots that do, heavier will be the pocket.
Este es el resultado de uno de los bolsillos de mi pantalón! Como veis, la lámina de aluminio se ha arrugado un poco. Realmente no queda nada mal a pesar de que esté arrugado, pero si no os acaba de convencer lo de las arrugas, buscad una lámina más resistente (aunque os será más difícil trabajarla). Espero que os animéis y también que si lo hacéis me enviéis la foto por Facebook AQUÍ!
This is the result of one of the pockets of my pants! As you can see, the foil is slightly wrinkled. It really is not all bad though that is wrinkled, but if you just convinced him of wrinkles, seek a more resistant film (although it will be more difficult to work it). I hope you feel encouraged and if you do send me a photo on Facebook HERE!


What a great idea dear!!!!! Love it too much<3<3<3
ResponderEliminarI became your new follower, if you can follow me back I will be very happy.
Have a nice weekend!
www.Lindissimaa.blogspot.com
Thanks Lidya! of course i will follow you too!
Eliminarxxx
Queda genial, una idea muy buena :)
ResponderEliminarBesitooos guapa
http://littleblackcoconut.blogspot.com.es/
la verdad es que es una ideal genial!quiza me anime... un besazo!
ResponderEliminarHe descubierto tu blog navegando y me ha encantado! Me ha gustado mucho este DIY.
ResponderEliminarMe gusta descubrir nuevas bloggers, participar y apoyarnos entre nosotras!!
Te sigo desde ya! Te dejo mi blog, y si te gusta, te invito a que formes parte de él :)
http://letoileduphare.blogspot.com/
Creo que hay que ser muy mañosa para ser capaz de hacerlo y que quede bien. Tú sin duda lo eres...yo creo que no sería capaz,jaja!!!
ResponderEliminarUn besote guapa!! y sigue con los DIY!!!;)
Anouckinha´s Closet
Gracias Anouckinha! La verdad que parece difícil pero simplemente hay que tener un poco de paciencia jaja yo te animo a que lo intentes! si no te sale este DIY también tengo un par más por el blog! espero que te gusten! xxx
EliminarQué chulos!!! :) Muaá
ResponderEliminarwww.followme-around.blogspot.com
Gracias!!
Eliminarxxx